I am really starting to grok the whole Silverlight experience. My desire to get involved in this was inspired by my initial push to develop a killer app for Windows Mobile 6, however, I am not sure if I have the time and patience ... we shall see.
Anyway, I wanted to start this whole journey off by getting familiar with Silverlight markup, so that encouraged me to start looking at tools that encourage you to manipulate the tags directly. I am not quite hardcore enough to use notepad but I did not want the dumb down experience provided by Visual Studio (drag and drop). So I came across Kaxaml which provides intellisense and a quick view pane and some choice samples. This allowed me to feel a little closer to the underbelly of the Silverlight markup.
So you are presented with the following blank slate to begin with which helps you define the overall parameters of the page.
<Page
  xmlns="http://schemas.microsoft.com/winfx/2006/xaml/presentation"
  xmlns:x="http://schemas.microsoft.com/winfx/2006/xaml">
  <Grid>

  Grid>
Page>
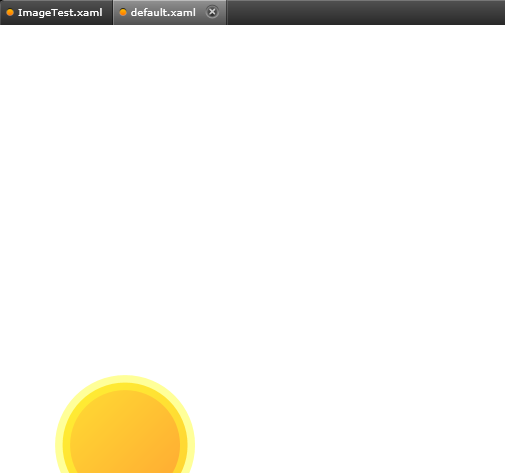
You can define some basic shapes these include the ellipse, rectangle, and a Line. As I show in the following example each object can have a variety of properties which I could not possibly list here. The following examples are represented in the images below.
<Ellipse x:Name="e6"Width="150" Height="150" Opacity="0.8" Stroke="#80FFFF00" StrokeThickness="15"> <Ellipse.Fill> <LinearGradientBrush StartPoint="0,0" EndPoint="1,1"> <GradientStop Offset="0" Color="Gold"/> <GradientStop Offset="1" Color="DarkOrange"/> LinearGradientBrush> Ellipse.Fill> Ellipse> <Image x:Name="i1"Width="300" Height="300" Source=".\My Pictures\BancroftCeiling.gif" Visibility="Visible"> <Image.RenderTransform> <RotateTransform> RotateTransform> Image.RenderTransform> Image>
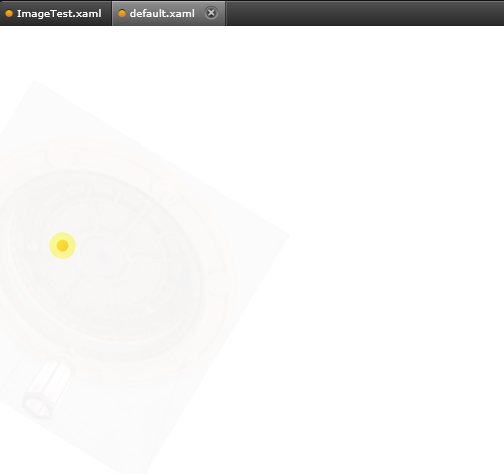
The most compelling part of Silverlight came when I looked into the animation (remember I have not touched any C# code yet), you can define animation purely within the markup. Animation is defined based on Timelines i.e. I can define what happens from point zero in a timeline, to the end of that timeline.
So in the following example I have a time line that goes on forever and I have defined within that timeline an animation to be performed between 0 to 8 seconds based on one of the objects that I have already created. Effectively the 'Left' property of the image is moved between 0 and 600 on the canvas. It is very simple to setup and you you can have quite graceful effects by animating several properties over various timelines. In my full example I chose to animate things like Opacity, Angle, Width and Height on a couple of objects.
<Storyboard BeginTime="0" Duration="Forever"> <DoubleAnimation AutoReverse="true" BeginTime="0:0:0"Duration="0:0:8"From="0" RepeatBehavior="Forever" Storyboard.TargetName="i1"Storyboard.TargetProperty="(Canvas.Left)"To="600"/>Storyboard>
Here a couple of snapshots of what happens in my window. If you download the code ensure to replace the image file with a valid gif you have on your PC. During one of my tests I animated as many as 10 objects and my CPU did not seem to mind much, let me know if you see any performance issues.

Hopefully for the next couple of projects I can look at Visual Studio and take advantage of the event driven model that we all love. I am thinking along the lines of user interaction or maybe even collisions between objects.
Comments are closed.